
Waterproof Branch Connectors
T, Y and Multi-Entry Bodies for Your Cable Branch Layout When an outdoor cable route divides, you need room for every cable and a clear plan for the circuits inside. JINH waterproof branch connectors bring existing T, Y and multi-entry CNP products together. Compare the physical arrangement first, then select the exact insert and cable-entry range for your project.
Quick Quote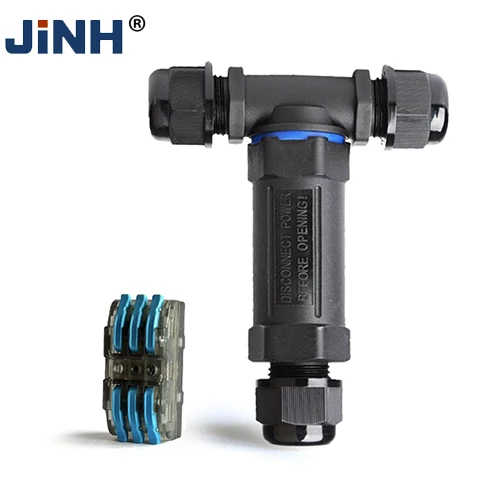
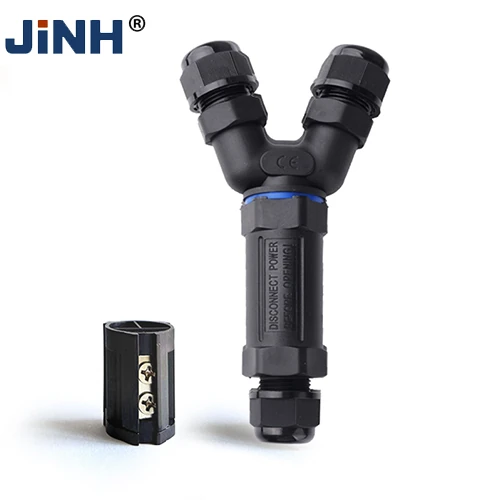
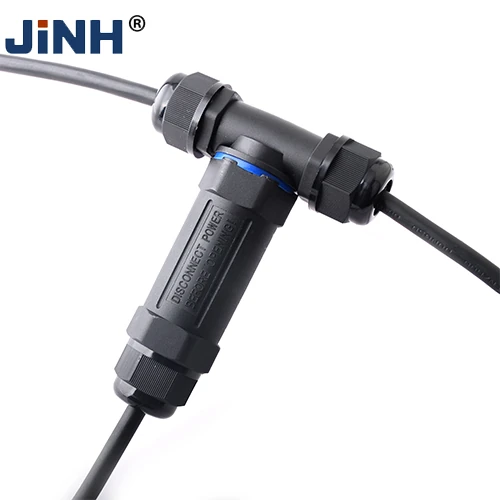
JINH T, Y and Multi-Entry Waterproof Branch Connectors
Start with a sketch of the cable route. Mark where each cable approaches the joint and where it needs to leave. This helps you compare body layouts before you spend time checking electrical details for a shape that will not fit the installation. A branch near a wall or lighting base can need a different entry direction from a branch in open space.
| Branch group | Existing products | What you should compare |
|---|---|---|
| T and Y bodies | CNP25T, CNP25Y, CNP35-Y | Entry direction and cable bending space |
| Three-entry and four-entry variants | CNP293X/3T, CNP293X/4T, CNP295X/3T, CNP295X/4T | The exact variant drawing and internal connection arrangement |
| Additional branch formats | CNP3732, CNP3742 | Body layout, conductor size and jacket range |
For a closer look at the T and Y arrangements, open CNP25T and CNP25Y. You can also review CNP293X/3T and CNP293X/4T as separate products. Keep the full suffix in your selection record so that a three-entry item is not substituted for a four-entry item.
Send Inquiry Now


How Waterproof Branch Connectors Organize Your Wiring
A branch connector brings several cable routes into one enclosed connection point. T and Y bodies arrange the entries in different directions; the /3T and /4T products provide distinct three-entry and four-entry formats. You can position the body around the direction of your cables rather than treating every junction as a straight joint.
Inside the body, the selected terminal arrangement determines which conductors connect together and which stay separate. Cable-entry count and electrical pole count therefore describe different parts of the product. Three entries do not identify every circuit within the insert or establish a universal input direction.
For your wiring layout, assign each cable a function and match it to the exact connection drawing. The body then provides the physical arrangement around that defined junction. Keep the full product suffix with the assembly information, especially when three-entry and four-entry versions appear similar in a purchase list.
Send Inquiry Now
A Defined Junction for Your Outdoor Cable Routes
A dedicated branch body gives your cable junction a clear location. This is useful where a landscape lighting run divides or several equipment cables meet near one installation point. The enclosure contains the connection, while the different entry directions help you arrange the approaching cables around nearby walls, fixtures or equipment.
Each cable still needs its own fit check. Compare its jacket diameter and conductor cross-section with the specified entry and insert. Where cables differ in size, record those dimensions separately. This makes the branch easier to assemble without depending on one measurement for every route.
Show the completed junction on your installation drawing, including cable support and bending space. Your electrical design must account for current through the shared connection and each outgoing route. The branch connector joins the conductors; circuit protection remains part of the surrounding electrical system.
Landscape Lighting Branches
Arrange cable routes where lighting runs divide. Check the location of the joint against your installation and inspection plan.
Outdoor Lighting Networks
Use the branch layout to organize a defined connection between separate cable routes. Match the selected insert to your circuit schedule.
Street Lighting Cable Routes
Compare the branch body’s direction with the space around the lighting equipment. Include cable bends in the space allowance.
Outdoor Equipment Branch Wiring
Review the range when an outdoor equipment installation includes a cable branch. Select the connector around the documented wiring arrangement.
For other connection formats, visit the Waterproof Connector collection. For the electrical selection background, see Connector Current Rating vs Wire Ampacity.
Application Scenario

Landscape Lighting Branches

Outdoor Lighting Networks

Street Lighting Cable Routes

Outdoor Equipment Branch Wiring
Branch Bodies Built Around Different Cable Routes
T and Y Formats
These existing body shapes give you different entry directions for arranging cables around the connection location.
Three- and Four-Entry Variants
The documented /3T and /4T products let you compare separate physical layouts within the branch collection.
Enclosed Branch Connection
The body brings the cable junction into a defined assembly rather than leaving the branch as an exposed wire joint.
Several CNP Product Formats
Nine existing entries give you a focused range to compare without mixing branch bodies with straight inline connectors.
Resource


Waterproof Branch Connectors FAQ
An unused opening needs the closing arrangement approved for the exact waterproof branch connector. Do not assume that tightening an empty cable gland creates a seal. If your layout uses fewer cables than the body provides for, confirm the permitted blanking component before you include that product in the design.
Only use that arrangement when the specific sealing component is designed and confirmed for it. Two cables fitting through an opening does not establish a seal around each jacket. Tell the supplier how many cables you intend to pass through that entry and request confirmation for the complete arrangement.
Treat the change as a revision to the connection, rather than simply attaching another cable. Check whether the exact product permits the new arrangement and have the revised circuit reviewed. You may need another connector or a different body; do not modify the housing to create an extra entry.
Assign each joint an identifier on your installation drawing and keep it associated with the connected cable labels. Use an identification method suitable for the location without covering required product markings. Your maintenance record should identify the actual joint, so a technician does not disconnect a neighboring branch by mistake.
Do not assume that the connector is a cable suspension device. Check the mechanical requirements of the exact product and provide the cable support required by your installation. The completed layout should avoid placing unintended pulling or twisting loads on the branch body and its individual cable entries.
Review the remaining assembly before returning it to service. The vacated entry needs an approved closure, and the internal connection must match the revised circuit. Record the change in your wiring documentation so the unused route is not mistaken for a missing cable during later inspection or repair.


