
Waterproof Inline Cable Connectors
Connect Two Cable Ends Along One Cable Route When you need to join an outdoor cable, the connector must fit both the wires inside and the jacket outside. JINH waterproof inline cable connectors give you CNP options for a straight cable connection. Choose the model that matches your circuit, cable size and preferred termination method before finalizing your installation.
Quick Quote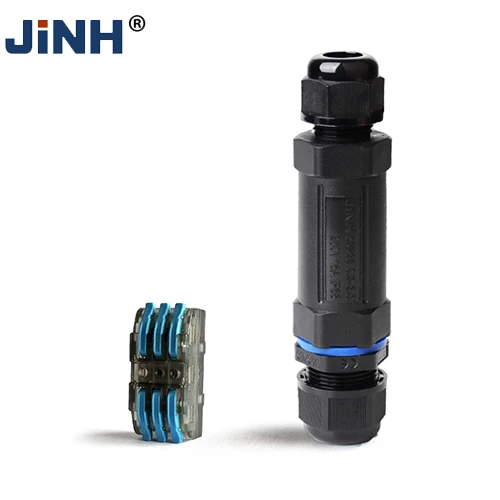
JINH CNP Waterproof Inline Cable Connectors
You can start with the cable already specified for your project. Record the number of conductors, each conductor’s cross-section and the outer diameter of the complete cable. These measurements answer different questions: the terminal must accept the wire, while the seal must fit the jacket. Selecting one measurement alone can leave you with a connector that fits only part of the cable assembly.
| Your selection question | Where to begin |
|---|---|
| Do you need a 3-, 4- or 5-pole option? | Review the available configurations on the CNP25 product page. |
| Are your conductors in the 1.5–4 mm² range? | Review the CNP35 product information and its remaining selection limits. |
| Do you need a two-pole spring-lever arrangement? | Check the CNP292X configuration. |
| Is your jacket diameter 5–10 mm? | Start with CNP373, then match its conductor range and pole options. |


How Waterproof Inline Cable Connectors Work
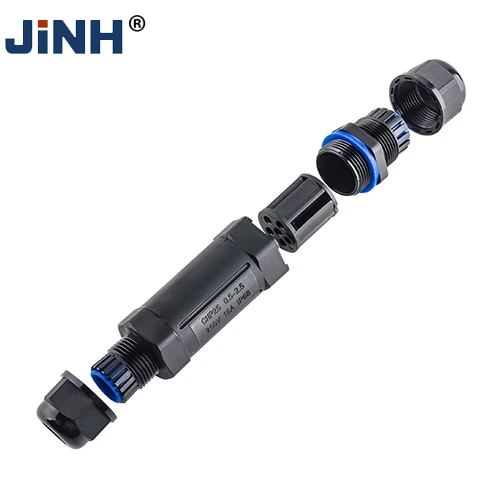
An inline connector joins the conductors from two cable ends inside one enclosed body. The terminal insert makes the electrical connections, while the outer components close around the cable entries. You get a joint along the existing cable route, without adding a T or Y branch that your installation does not need.
The conductor connection and the cable seal have different jobs. Each wire belongs in its assigned terminal position; the cable jacket passes through the entry arrangement. This distinction explains why both conductor size and complete cable diameter matter when choosing a CNP model. A good fit at the terminal cannot compensate for a jacket that does not fit the seal.
Depending on the selected product, the insert uses its documented terminal arrangement. For example, CNP292X provides a spring-lever option. Use the exact model instructions for preparation and closure, so your completed joint keeps the intended electrical connection and sealing arrangement together.
Send Inquiry Now
A Straight Cable Joint That Fits Your Installation
The inline format is useful when you want to extend a lead or join two cables without changing the route. Its enclosed body brings the joint into one defined connection point, making it easier to show that location on your lighting or equipment drawing. You can plan access around that point rather than leaving an unprotected splice along the cable.
The range also lets you work around the cable your project already uses. Different CNP products offer different pole arrangements, conductor ranges and entry dimensions. That choice helps you find a body and insert suited to the job instead of trying to force every cable into one connector size.
Leave enough room to close the body and support the cable without a sharp bend at the entry. This makes installation and later inspection more practical. For the detailed selection sequence, see our waterproof wire connector guide. Use the selected model’s documented limits for the completed assembly.
Outdoor Lighting Cable Connections
Use an inline arrangement where two lighting cable ends meet along one route. Keep the connection location practical for installation and later access.
Landscape Lighting Routes
Choose the cable and connector together when planning a joint between lighting positions. Confirm the approved environment for the exact assembly you select.
Street Lighting Connections
Match the connector to the cable schedule for the lighting connection. Check the available space around the equipment before selecting the body size.
Outdoor Equipment Wiring
Review an inline connector when your equipment cable needs a cable-to-cable joint. Keep electrical limits specific to the chosen product.
If your project uses another connection format, return to the Waterproof Connector collection. For the relationship between cable capacity and a connector marking, read Connector Current Rating vs Wire Ampacity.
Application Scenario

Outdoor Lighting Cable Connections

Landscape Lighting Routes

Street Lighting Connections

Outdoor Equipment Wiring
Product Features That Support Your Cable Joint
Two-End Inline Format
The straight body connects two cable ends along a single route, keeping the physical arrangement suited to an extension or joint.
Different Pole Configurations
Existing CNP products offer circuit-count choices, so you can select an insert around your actual conductor schedule.
Different Terminal Arrangements
The collection includes model-specific termination choices, including the CNP292X spring-lever arrangement, for different assembly preferences.
Different Cable-Fit Options
Cable-entry and conductor ranges vary between products, giving you alternatives when one enclosure size does not fit your specified cable.
Resource


Waterproof Inline Cable Connectors FAQ
Check whether the exact product permits reuse and inspect the parts before making that decision. A damaged seal, cracked body or worn terminal can affect the rebuilt connection. You should replace any component that is no longer fit for service and follow the original assembly requirements for the new joint.
Do not decide from diameter alone. Ask whether the selected sealing arrangement is suitable for both jacket materials and their surface condition. If you are comparing an existing cable with a replacement cable, provide the cable specifications so the proposed combination can be checked before you assemble it.
Use only mating parts confirmed for the selected assembly. Similar threads or a matching color do not establish that two models form a correct pair. If you already have one half installed, identify it first and request the matching component rather than choosing another half by appearance.
Check the product’s material and maintenance requirements before applying paint or another coating. A coating can obscure markings and interfere with parts that must open later. Keep the connector identifiable, and obtain confirmation for the proposed coating instead of treating it as an approved way to improve sealing.
Disconnect the affected circuit using your site’s approved procedure and have the assembly inspected. Review the seal, cable jacket, closure and evidence of mechanical damage. Drying the outside alone does not establish that the joint is serviceable; the cause needs to be found before the connection returns to use.
Use the product’s storage requirements rather than its assembled protection rating to decide how to store spare parts. Keep loose components clean and protect seals and terminals from contamination. Your storage plan should also keep matched parts together so that the correct assembly is available when installation begins.


